Elevate your home cooking game by crafting your very own delicious pizza using the iconic Roberta’s pizza dough recipe.
With a legacy hailing from the heart of Brooklyn, Roberta’s has garnered fame for its mouth-watering pizzas, and now you can recreate their magic in your own kitchen.
Whether you’re an experienced chef or a culinary novice, this comprehensive guide will help you master the art of crafting an authentic Neapolitan-style pizza crust.
Table of Contents
Unveiling the Essence of Roberta’s Pizza Dough
Roberta’s Pizza Dough is a culinary adventure that captures the spirit of artisanal pizza creation from scratch; it’s about more than simply wheat, water, yeast, and salt.
Located in the center of Brooklyn, Roberta’s has developed a cult-like following thanks to its amazing pizzas, and the secret to its success is the dough.
Roberta’s dough is unique because it combines careful attention to detail with simplicity.
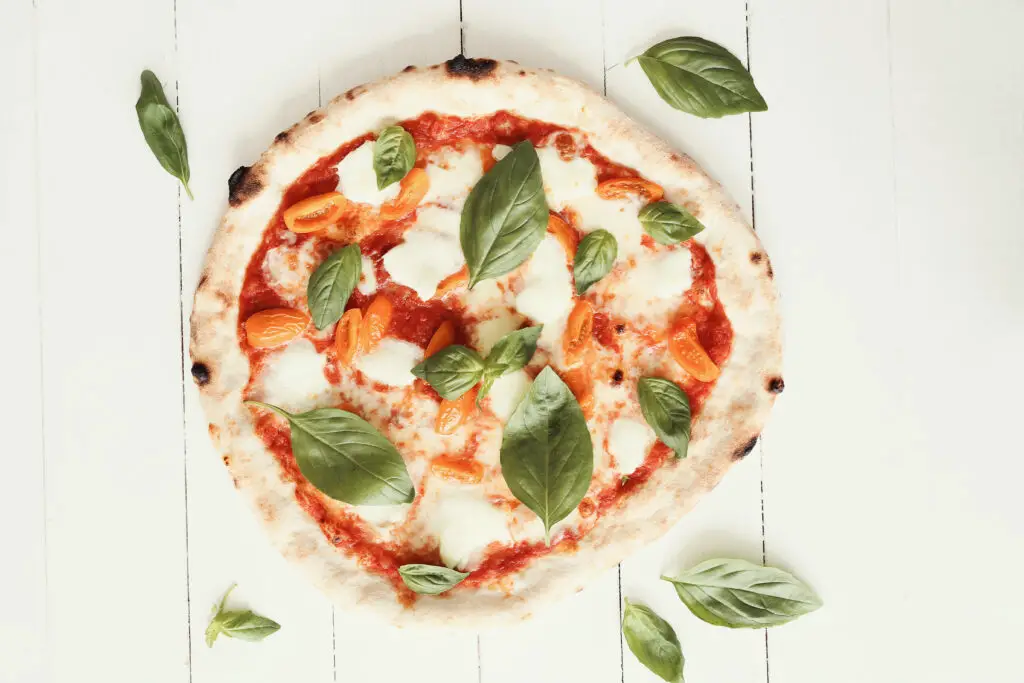
A trademark that echoes the depths of Italian culinary tradition, the thin and crispy crust perfectly captures the essence of Roberta’s style of pizza dough.
Perfectly crafted, this dough recipe has gained international renown for its superior quality.
Spread thinly on a baking sheet, it becomes the base of a delicious thin-crust pizza that embodies Italian cuisine and pleases palates all over the world.
Related Read: Can You Use Fresh Organic Flour for Pizza Dough?
Step-by-Step Dough Crafting: Your Journey to Culinary Bliss
Before you sign on to your Italian pizza-making expedition following Roberta’s dough recipe, ensure you’ve gathered essentials such as a spacious mixing bowl, a dampened cloth for covering, and your preferred beverage for hydration.
This recipe is designed to yield two 12-inch pizzas or four mini ones.
The Essential Dry Ingredients:
- 153 grams 00 flour (1 cup plus 1 tablespoon)
- 153 grams all-purpose flour (1 cup plus 1 tablespoon and 2 teaspoons)
- 8 grams fine sea salt (1 teaspoon)
- 2 grams active dry yeast (3/4 teaspoon)
- 4 grams extra-virgin olive oil (1 teaspoon)
- 200 grams lukewarm water (1 cup)
Homemade pizza hack: If you’re missing 00 flour, King Arthur bread flour is a splendid alternative.
Mixing and Kneading: The Path to Perfection
- To start your cooking adventure, combine a small bowl with lukewarm water or warm water, active dry yeast, and extra-virgin olive oil. Give the mixture time to settle so the flavors can combine and the yeast can reawaken.
- In the meantime, carefully mix the two flours in a larger bowl with a little teaspoon of fine sea salt, making sure to include each ingredient as well as possible. This methodical procedure creates the ideal flour mixture, which is the basis for a delicious crust.
- Gently stir in the water and yeast mixture until the flour mixture comes together. Use your hands to gently work the ingredients into a cohesive dough. Accept the tactile sensation as the dough starts to take shape beneath your fingertips, capturing the spirit of age-old Italian artistry.
- Start a kneading practice and give this revolutionary culinary art three minutes of your time. After that, give the dough a break and let it rest for 15 minutes so that it can develop more character and power.
- Bring your rejuvenated energy back to the dough and knead it for 3 more minutes, or until it reaches the delicate, supple texture of your earlobe, which is a witness to the artisanal finesse that goes into each fold and crease.
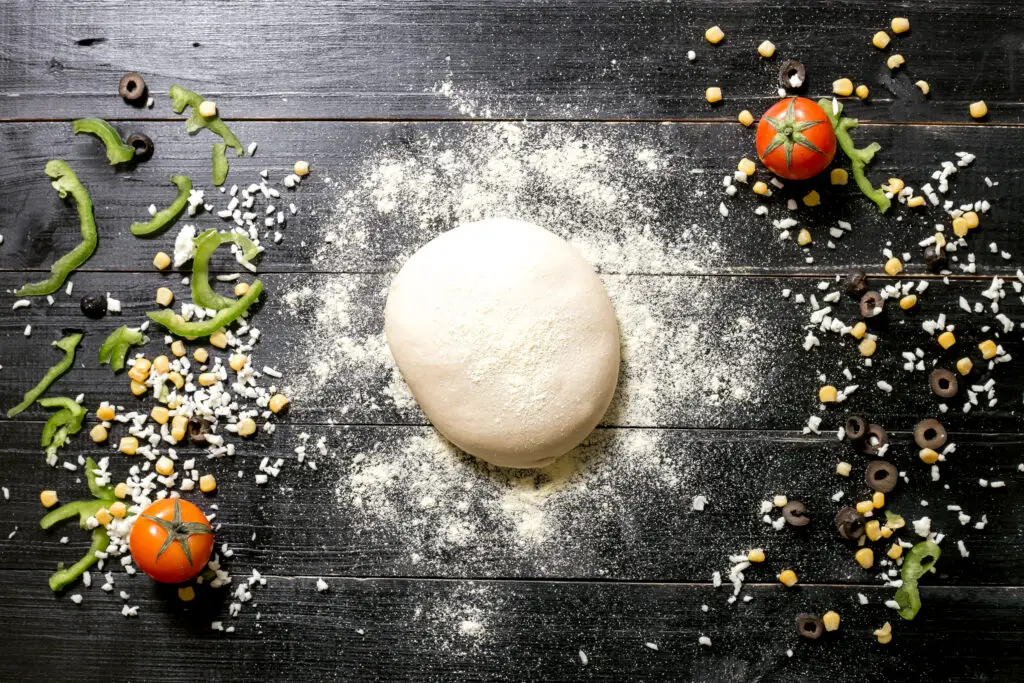
- Split the dough in half and use your hands to form each into a perfect ball of dough. This is a crucial step that guarantees consistency in flavor and texture for every delicious slice of Italian pizza.
- Place the dough balls in a large, well-floured dish, allowing them plenty of room to expand and expand. Cover them with plastic wrap or a moist tea towel to create a caring atmosphere that will promote flavor development and fermentation.
- Welcome the passing of time as you permit the dough to rise, calling forth its maximum potential during 8 to 24 hours in the cool refrigerator. Alternatively, if you are pressed for time, enjoy a quicker rise of three to four hours at room temperature, with every minute filled with the promise of deliciousness.
Mastering the Art of Pizza Creation
- Preheat Magic: Whether using an Ooni pizza oven, a cast iron skillet, or a pizza stone, heat your preferred cooking surface to a scorching 500°F to set the stage for great pizza. Reaching that desired crispy crust that characterizes a great Italian pizza requires this temperature.
- Shape and Method: Embrace the creativity of making your own pizza by hand instead of using a bread machine. Form the dough with your fingertips on a floured surface. Keep those lovely air bubbles intact, as they are the essence of a masterful Neapolitan dish.
- Fermentation Magic: Watch the miracle of fermentation as the gluten transforms the dough, demonstrating its transforming power. Your pizza’s potential for excellence is completely realized during this critical phase, laying the groundwork for an incredibly memorable eating experience.
Related Read: Quick And Easy Way To Make Pizza Dough Without Yeast
8 Top Tips for Crafting Perfect Roberta’s Pizza Dough

Creating the ultimate pizza dough masterpiece takes a touch of finesse and a dash of know-how. Here are some top tips to ensure your journey with Roberta’s pizza dough is an unforgettable one:
1. Mindful Kneading:
Kneading is more than just a process; it’s a subtle dance between flour and water, a mutually beneficial partnership that forms the foundation of your dough’s structure.
Use deliberate, light motions to promote the formation of gluten without going overboard in terms of exertion.
A carefully worked dough results in a crust that is just the right amount of chewy and delicate, taking the experience of eating pizza to new culinary heights.
2. Saucy Selections:
Try a wide variety of pizza sauces to elevate your pizza experience.
Whether you go for the ageless charm of a classic tomato-based, the opulent creaminess of pesto, or the daring creativity of garlic-infused blends, the right sauce can take your pizza from delicious to spectacular.
Try blending different flavors and textures to create pizzas that entice the senses and satisfy all palates.
3. Masterful Mozzarella:
Regarded as the king of pizza cheeses, mozzarella needs to be a sacred ingredient in whatever pizza-making you do.
Take care to use only the best and freshest mozzarella, and explore the magic of buffalo mozzarella to give your dish a true Neapolitan flavor.
Allow it to blend in with the dough so that each delicious mouthful creates a symphony of aromas that entices the palate.
4. Artistry with Pesto:
Savor the appealing smell of pesto, adding a unique and delicious topping to your pizza experience.
Whether you choose the classic appeal of classic basil pesto or push the boundaries of culinary creativity with variations like sun-dried tomato or spinach, adding pesto to your pizza ensures that the vibrant flavors will meld smoothly with the savory crust.
Allow your taste buds to take a culinary trip as the flavorful depth of the pesto turns every bite into a symphony of mouthwatering flavors, adding to the overall satisfying experience of your pizza creation.
5. Temperature Tango:
When preparing pizza, temperature is an important factor that affects both the dough and the cooking environment.
For the dough to rise, a constant temperature must be maintained.
This stage of fermentation is best facilitated by consistency and control, which results in a lighter and more flavorful crust that improves the pizza-eating experience in general.
6. Mind the Rest:
Just as a composer rests between notes, your dough needs moments of respite.
Allow the dough to rest at different stages of preparation to let the flavors meld and the gluten relax.
These resting periods contribute to the final texture and flavor of your pizza.
7. Perfectly Planned Portions:
To ensure uniformity in your pizza creations, divide your dough into portions of the same size.
This practice guarantees consistent baking and a balanced distribution of toppings, leading to a harmonious dining experience.
8. Embrace the Journey:
Making Roberta’s pizza dough is more than just a chore; it’s an adventure into the world of fine cuisine.
Accept this trip as a learning experience where each fold and knead serves as a lesson in the craft of making pizza.
Have the courage to experiment, to think outside the box, and to add your own unique creativity to your dough.
Celebrate your success with every rise and bake, since they are the building blocks for creating the ultimate pizza masterpiece.
The Culinary Symphony: Roberta’s Pizza Dough in Action
Crafting Roberta’s pizza dough is more than following a recipe; it’s a journey into the realm of culinary excellence. As you knead, shape, and tend to your dough, you’re immersing yourself in the very essence of pizza-making.
Delve into the realm of flavors as you experiment with different pizza sauce variations and unleash your creativity with an array of toppings. With every rise, your dough matures, inching its way towards its destiny—a canvas for creating the pinnacle of pizza perfection.
The combination of meticulously kneaded dough, harmoniously blended pizza sauce, and the finest toppings like mozzarella and pesto culminate in a symphony of taste that represents the epitome of the best pizza you’ll ever savor.
Related Read: 18 Best Pizza Flavors You Need to Try (Some May Shock You)
Inspired by Sam Sifton‘s celebrated recipe featured in The New York Times.
